Big Wall and Aid Climbing: Techniques, Gear, and Best Practices
A comprehensive guide to the vertical world of big wall and aid climbing. Learn essential techniques, specialized gear requirements, historical context, and safety considerations for tackling multi-day ascents on the world's largest rock faces.
Content Detail Level:
Intermediate Level: More detailed information for climbers with some experience. Includes additional techniques, considerations, and system variations.
Warning: Advanced Climbing Techniques
Big wall and aid climbing require specialized knowledge, skills, and extensive gear management. The information provided here is for educational purposes only. Always seek proper training from qualified instructors before attempting these advanced climbing techniques.
Overview of Big Wall and Aid Climbing
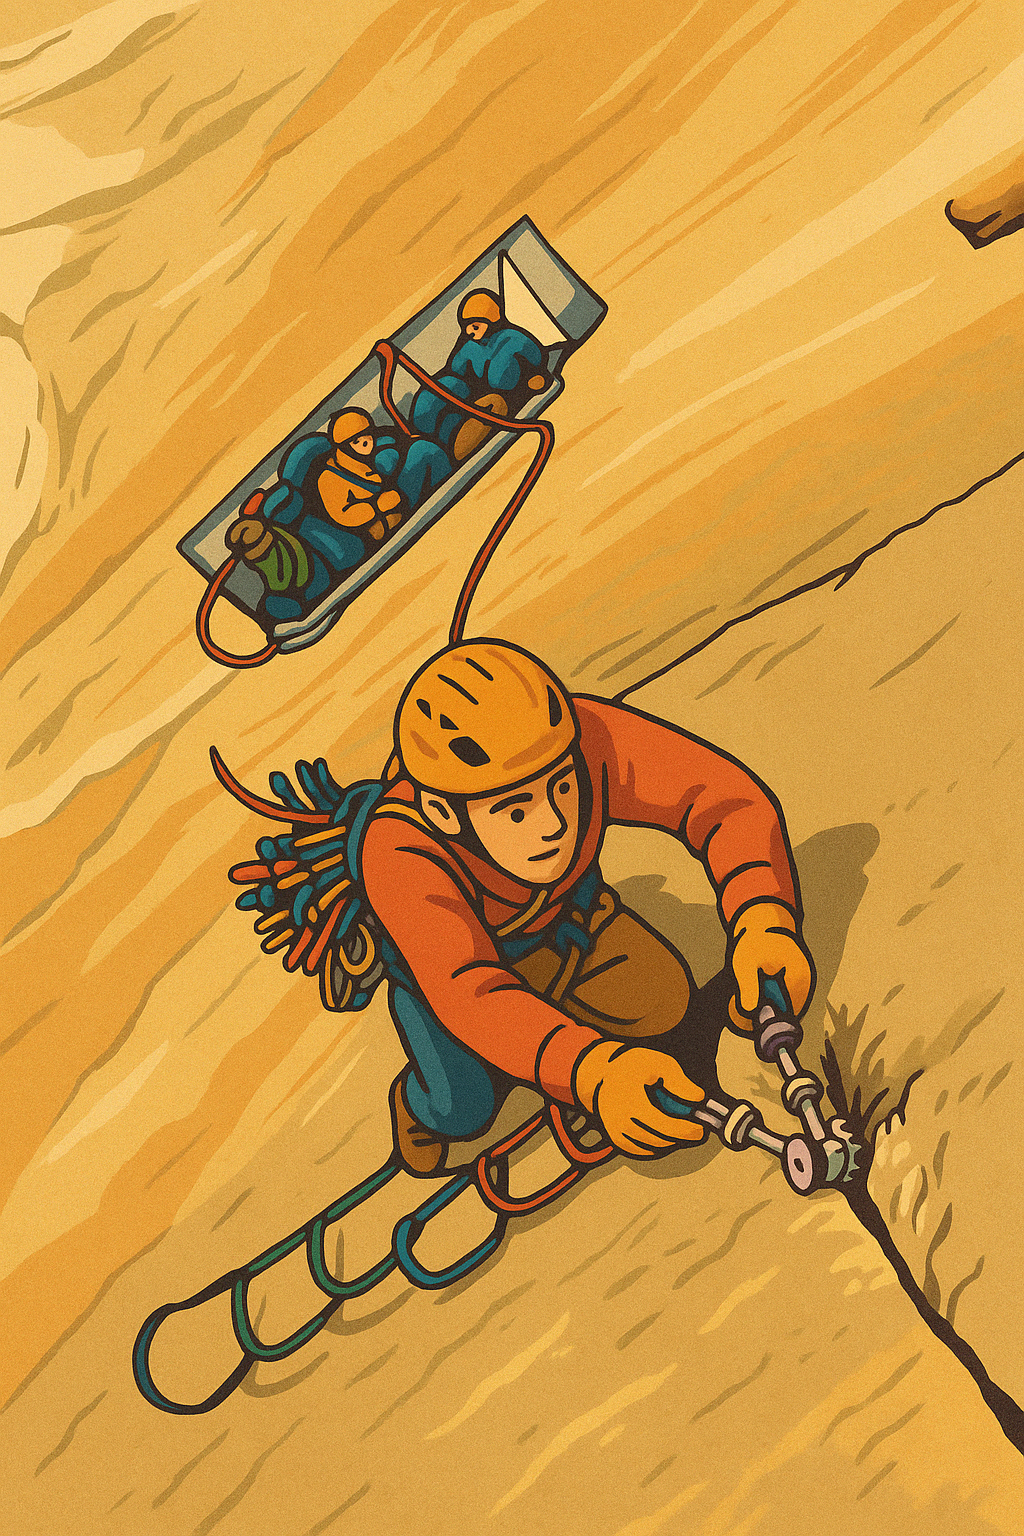
A climber carefully inching up an aid pitch on a big wall in Yosemite. Big wall routes often involve steep, sustained aid climbing with complex gear systems.
What is Big Wall Climbing?
Big wall climbing refers to climbing large, long rock faces that typically take multiple days (often involving one or more nights spent on the wall) to complete. These climbs are usually sheer multi-pitch routes hundreds of meters tall, where climbers are exposed on the face for extended periods. Big walls are "walls so big you can't get up it in one push". Classic examples include the big granite faces of Yosemite (El Capitan, Half Dome) and remote alpine walls in Patagonia and Baffin Island.
Aid Climbing vs. Free Climbing
On big walls, climbers often resort to aid climbing techniques to make upward progress. Aid climbing means using gear placed in the rock to stand on or pull on (via ladders called aiders or etriers) rather than just hands and feet on rock holds. This allows ascending sections of blank or extremely difficult rock that cannot be free-climbed.
In the past, big walls were done almost entirely with aid (sometimes involving siege tactics with hundreds of pitons). Modern ethics encourage using aid sparingly – many big wall routes have since been free-climbed by elite climbers, but aid techniques remain essential for most parties tackling these immense climbs.
The Big Wall Environment
Big wall ascents present special challenges. Climbers are self-sufficient for days, hauling up food, water, and shelter. They typically sleep on the wall at belay ledges or on portable ledges called portaledges. Weather exposure, rockfall hazard, and sheer exhaustion are part of the game. Strategy and efficiency are critical: teams must manage complex rope systems, heavy haul bags, and tricky logistics at belays high above the ground.
Big wall climbing is often done by teams of two in a leader–second format, but unlike standard multi-pitch free climbs, the second usually ascends the rope (jumaring) rather than climbing, to save time and energy. Overall, big wall climbs are an adventure in vertical camping and technical problem-solving as much as pure rock climbing.
Key Terminology
- Aid Climbing: Using placed gear to make upward progress rather than just rock features
- Aiders/Etriers: Nylon webbing ladders used to stand on gear placements
- Portaledge: A portable, hanging tent system for sleeping on vertical walls
- Haul Bag: Heavy-duty bag used to transport gear, food, and water up the wall
- Jumaring: Ascending a fixed rope using mechanical rope-grab devices
- Clean Aid: Aid climbing without damaging the rock (no hammered pitons)
- Grade VI: Rating for a big wall climb that typically takes multiple days
Aid Climbing Systems and Techniques Visualization
Basic Aid Climbing Progression
Aid Climbing Sequence Diagram
A step-by-step visual guide showing the progression of aid climbing techniques.
Aid climbing progression showing the step-by-step sequence: 1) Place gear, 2) Test placement, 3) Weight gear and clip aider, 4) Step up as high as possible, 5) Place next piece, and 6) Progress upward.
- Place Protection: Leader places a piece of gear (cam, nut, hook, etc.) as high as possible
- Test the Piece: Carefully test the gear to ensure it will hold body weight
- Clip and Weight: Attach aider (etrier) and daisy chain to the piece, then transfer weight onto it
- Step Up: Climb up the aider steps, getting as high as possible (often "top-stepping")
- Secure Position: Use a fifi hook to maintain position while placing the next piece
- Clip Rope: Once secure on the new placement, clip the rope to the previous piece
- Repeat: Continue the sequence to progress up the wall
The Second's System: Jumaring and Cleaning
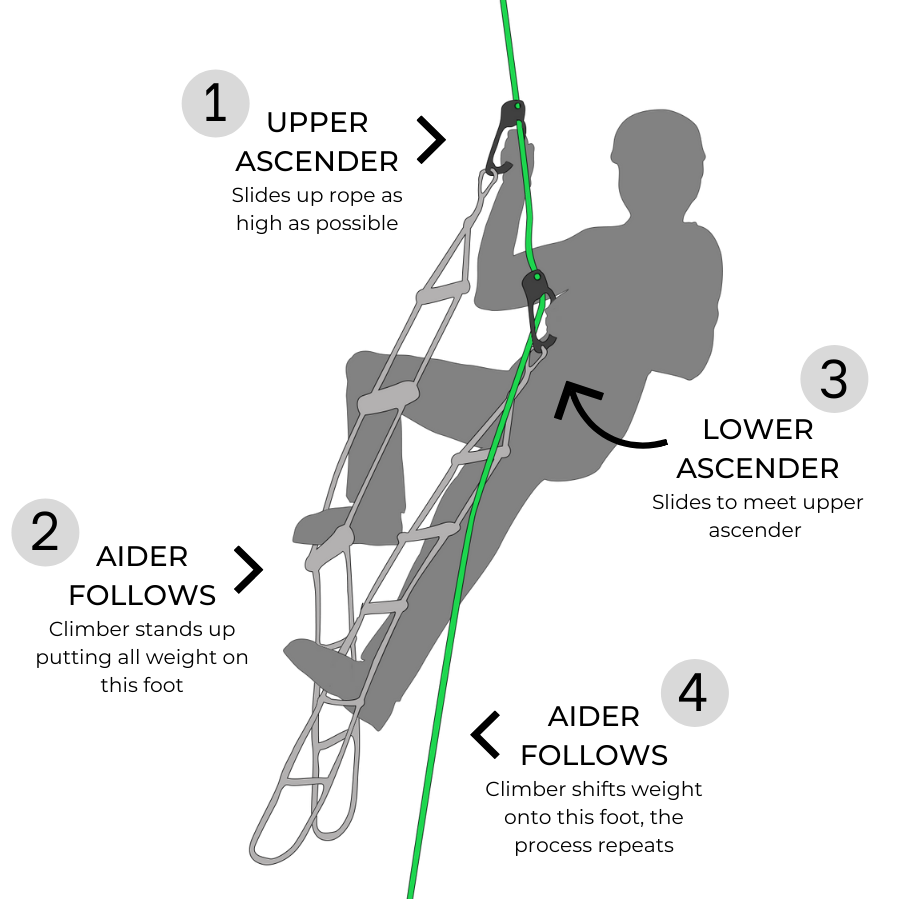
The second climber's setup showing the dual ascender system with proper backup. The climber ascends the fixed rope while removing protection.
- Top Ascender: Connected to harness with adjustable tether and positioned above
- Bottom Ascender: Connected to foot loop/aider for standing and pushing up
- Safety Backup: Periodic backup knots or third device (GriGri) connected below
- Cleaning Process: At each piece, unclip rope, remove gear, and continue ascending
- Traverse Technique: For horizontal sections, use lower-out techniques to manage swing
Hauling Systems
Hauling System Diagram
Comparison illustration of 1:1 direct hauling and 2:1 mechanical advantage systems.
Comparison of 1:1 direct hauling (left) and 2:1 mechanical advantage hauling system (right) for lifting heavy loads up a big wall.
1:1 Direct Hauling
- Progress capture pulley attached to anchor
- Static haul line running from haul bag through pulley
- Hauler pulls directly on rope
- Simple but requires more strength
2:1 Mechanical Advantage
- Pulley attached to haul bag
- Rope redirected through pulley back to anchor
- Climber pulls down, creating mechanical advantage
- Moves half the distance but requires half the force
Portaledge Setup
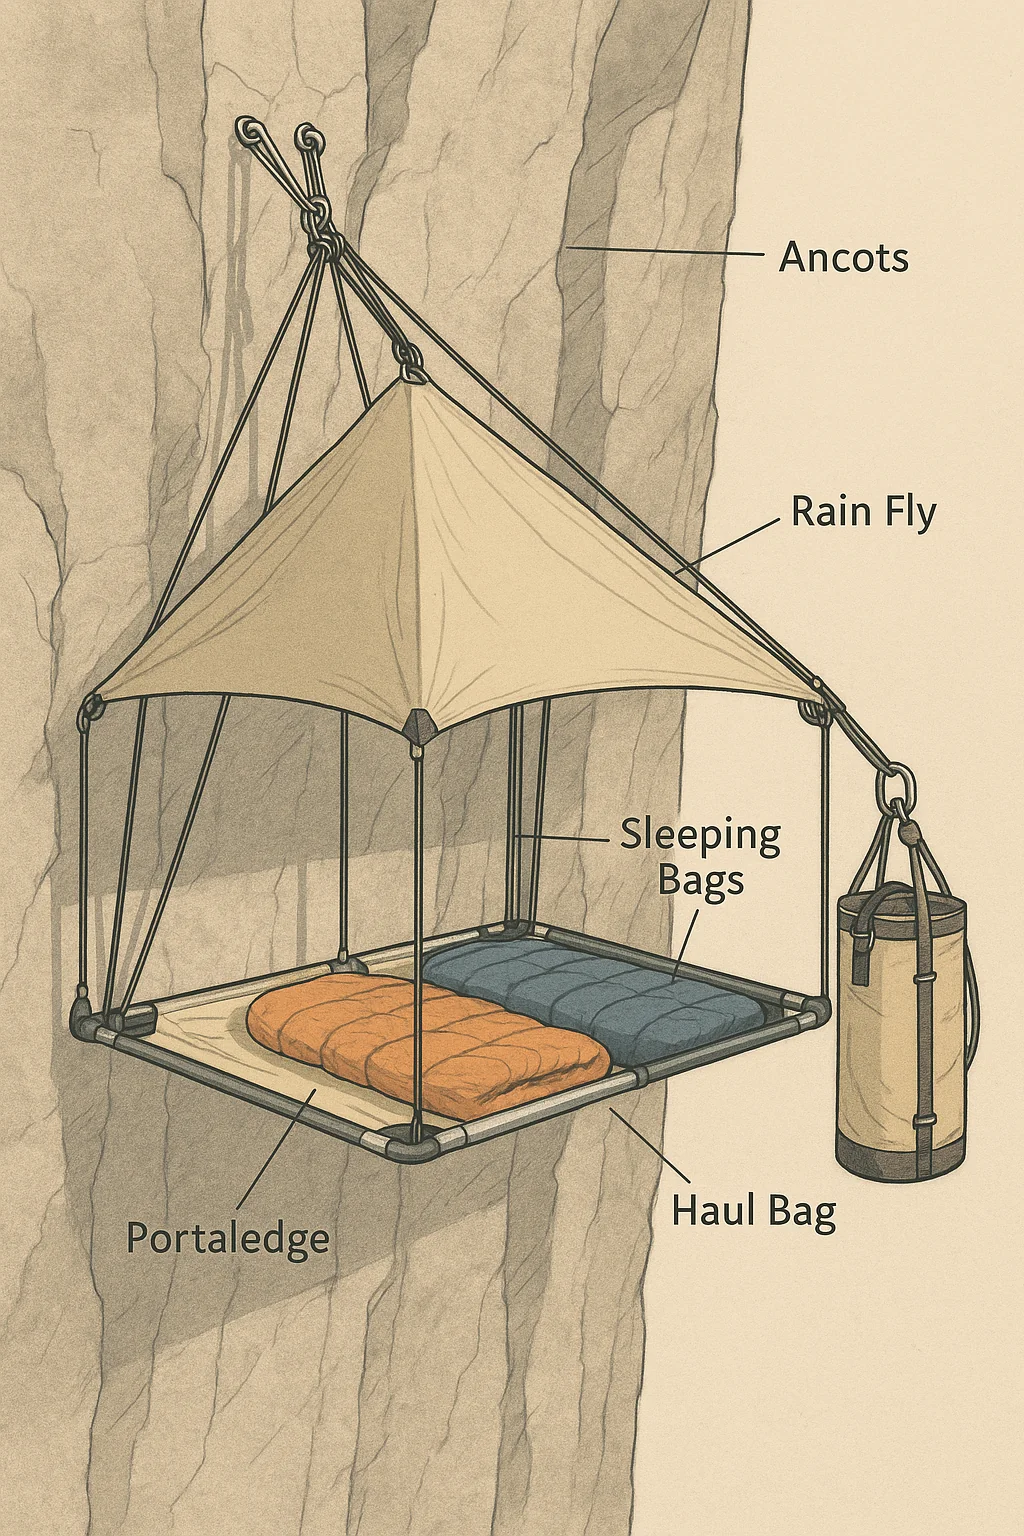
Proper portaledge deployment showing main suspension point, frame assembly, and fly configuration for weather protection.
Key Components:
- Main Suspension: Single-point or multi-point hanging system
- Frame Structure: Interlocking tubes that create a rigid platform
- Bed Platform: Tensioned fabric that creates sleeping surface
- Weather Fly: Waterproof cover that protects from elements
- Anchor Distribution: Proper placement of portaledge, haul bags, and climbers at belay
Note: The diagrams represent general techniques. Specific equipment setups may vary based on manufacturer recommendations and personal preferences. Always practice these systems in a safe environment before attempting on a big wall.